This project describes how to set up an ESP32-CAM and a Raspberry Pi for monitoring a little garden.
Contents:
- Setup Arduino IDE
- Program the ESP
- FDTI vs Arduino
- Connection
- Raspberry Pi Setup
- Raspbian
- Edger
- Filesystem
- Basic commands
- Wifi and SSH at boot
- FTP
Setup Arduino IDE
Install the IDE from here : ARDUINO IDE
Add ESP32 Boards to the IDE
Go to preferences and add :
https://dl.espressif.com/dl/package_esp32_index.json
under
Additional Boards Manager URL's .

Download all ESP32 packages
In the IDE go to Tools -> Board XY -> Boards Manager and search for ESP32.
Click on the package and install it.
Choose Board
Go to Tools -> Board and select ESP32 Wrover Module.
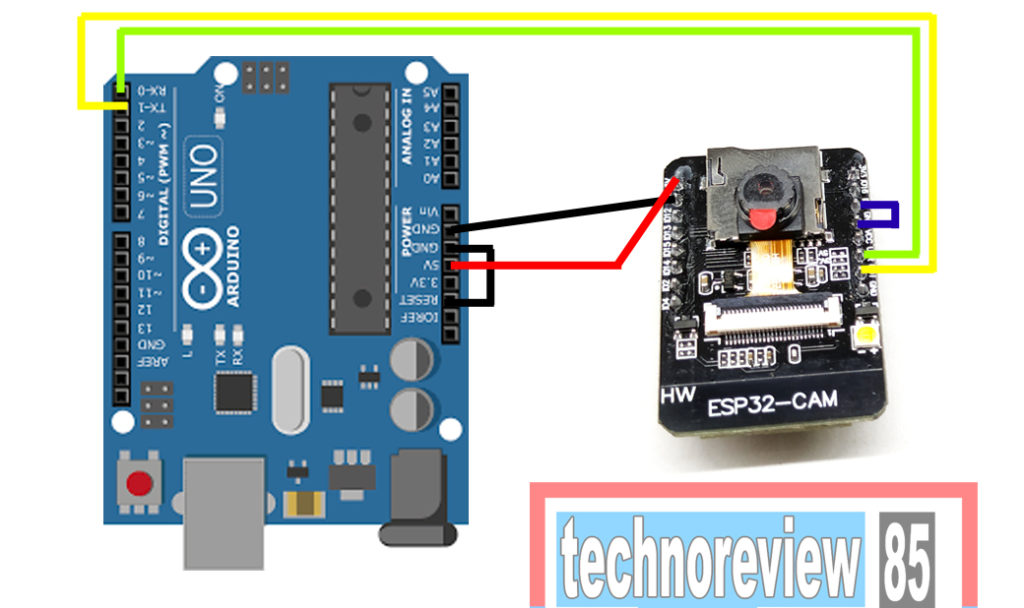
Program the ESP
Problem
The ESP32-CAM does not have a USB connector.
Normally you program such chip with a FDTI.
We will do this using another Board (Arduino Uno).
Picture of a FDTI:

Setup
| arduino | esp32-cam | ARDUINO | ESP32-CAM | Explanation | | ————- |:————-:|:————-:|:————-:|:————-:| | 5V | 5V | | | The ESP needs power for the chip| | GND | GND | | | To create a circuit we always have to connect - (GND) to - (GND)| | RX | U0R (RX) | | | Data Receive line | | TX | U0T (TX) | | | Data Transmit line| | RESET | | GND | | This forbids the Arduino to program its own chip since we want to program the ESP not the Arduino | | | D0 | | GND| This enables Flash mode on the ESP, after flashing this can be disconnected |
Flash Settings
Go to Tools and set these settings:
Port             > Select Port where arduino is connected
Flash Mode       > QIO
Flash Frequency  > 40MHZ
Partition Scheme > Huge App (3mb No OTA)
Upload speed     > 115200
Programmer       > AVR ISP
Upload a Program
After everything has been wired and installed, go to
Files -> Examples -> ESP32 -> Camera -> CameraWebServer.
Then click upload.
After the finished upload, disconnect D0 from GND and press the onboard reset button.